Devin Devine, stone masonry contractor and consultant. Projects completed across the USA
devin@devineescapes.com
I took some photos during a recent flagstone repair job, and thought I’d put together a tutorial on how to repair flagstone, part of my continuing DIY flagstone series. Please note, that if you need individual help with your flagstone project, I now offer DIY phone consultation services.
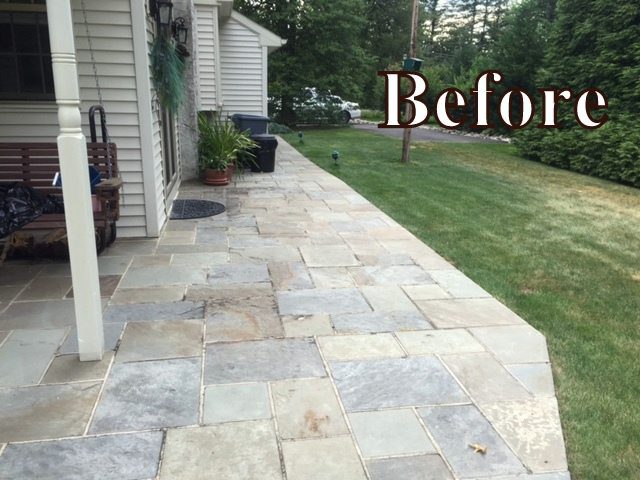
Flagstone patio set in cement. The patio, In Ambler Pennsylvania, has a few years on it and now most of the mortar in between the stones is all cracked up. In fact, there were no sections of unbroken mortar that were longer than 10 inches. As such, my prescription was complete removal of all mortar from between the flagstones and replacement with new, type S masonry mortar.
How to Re-point Flagstone
So the first thing to do is remove the old mortar. The way you do that will depend on the project. How big are the joints, how broken up are they, are they regular straight lines, or is the flagstone irregular and natural shaped? Either way, the tool kit that I use will generally be the same: an angle grinder with a four and a half inch diamond blade on it and a hammer and chisel, maybe a large flat head screw driver.
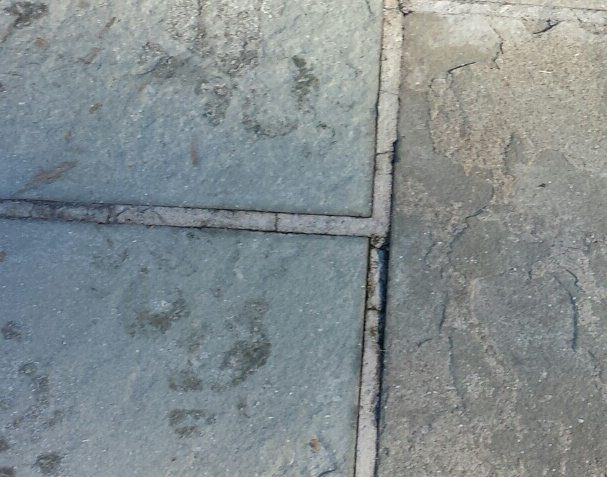
Another before photo. Close up: yeah, that cement is all broken up alright
One way to remove the old cracked up mortar is to take your angle grinder and cut a line through the center of the mortar….only as deep as the cement joint. You do not need to cut all the way down into the concrete. An inch deep will do it.

like so
After that you can take a chisel and hold it at a forty five degree angle, and come at the joint from the sides. Strike down upon the mortar from the right side and then from the left. Should pop out fairly easily. Again, the method you use will greatly be determined by the shape and size and condition of your mortar joint.
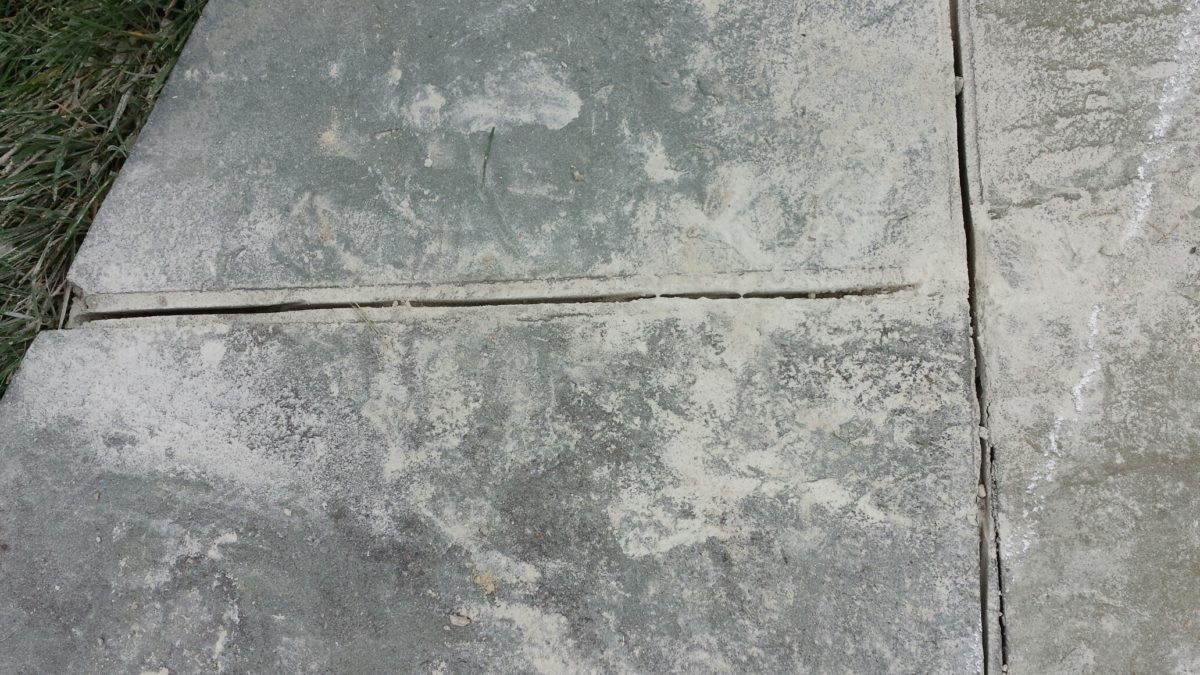
and here the mortar is completely removed
This was an 800 square foot patio. We used different technique on different sections, but the above method worked for most of it. Some areas, the mortar had enough cracks in it and was loose enough that we could just wedge a small chisel–or a large flat-head screwdriver–and just pry out the loose mortar.
Really, most of the joints could have been removed with just a hammer and chisel. And that sounds attractive, right? Less noise, less dust, more eco. However.A) that would have taken awhile longer and B) many stones would have popped loose that way. Using the hammer and chisel creates greater impact. Now if we bust up the stones and have to re-lay them…that’s more work, more cement, less eco. So we’ll usually try using just the chisel–when too many stone pop up loose, we switch to the grinder.
Okay, so you’ve removed all the old broken up mortar from between your flagstones. Good job!
Have a sandwich, you deserve it.
But before we get to learning how-to repoint our flagstone patio, you need to clean out them joints, remove any loose mortar that might be remaining and clean out the dust. My usual method is alternating turns with the leaf blower and the hose. Use a broom to pick up any larger bits of old mortar that is still on the patio. Blow out all the dust, then spray it down, then blow it out again. Your mortar will not adhere to dust, so whatever method you use, just be sure to get them joints clean.
Replacing the flagstone joints with new mortar
Okay, so you’ve removed all the old mortar and gotten them joints nice and clean. Now it’s time to learn how to repoint a flagstone patio. ***Here’s my method:
First thing I do is load up my diamond trowel in my left hand and hold it over the flagstone joint.
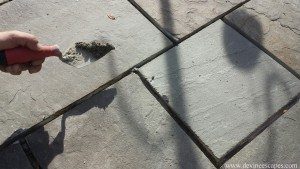

Then I take my tuck pointing trowel and slide the mortar off of my diamond trow…

And push the mortar down in-between the flagstones.

Really push it down.
Then add more if you need to.
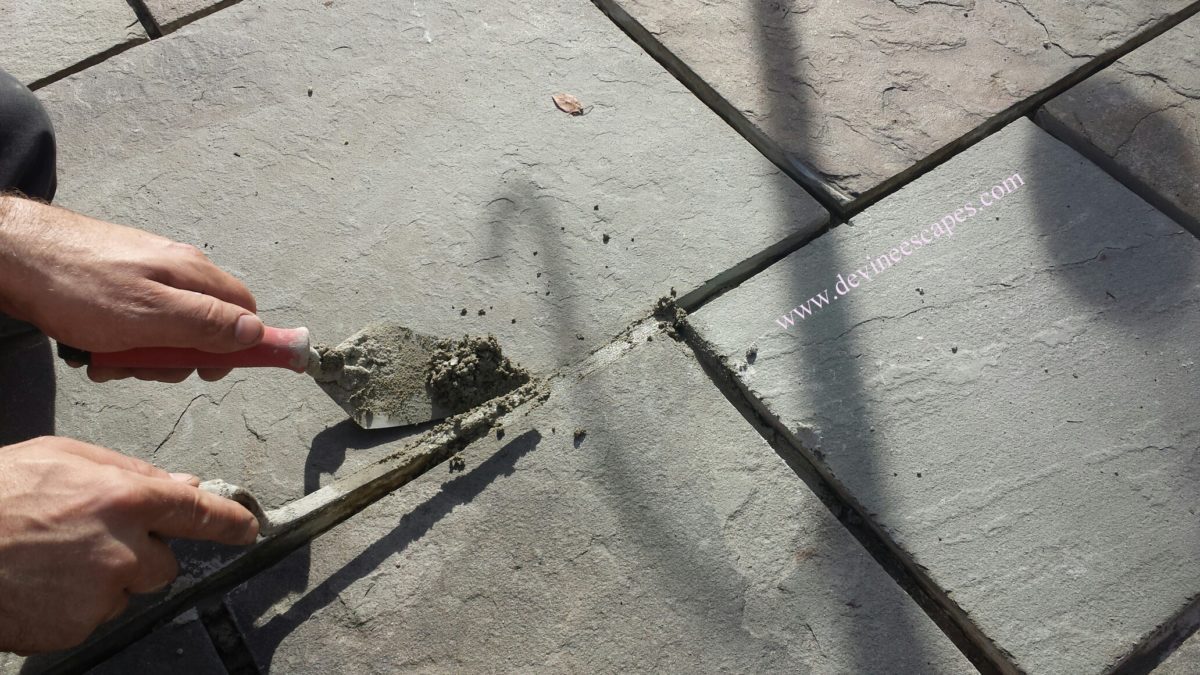
Use the tuck pointing trow to get the cement nice and smooth.
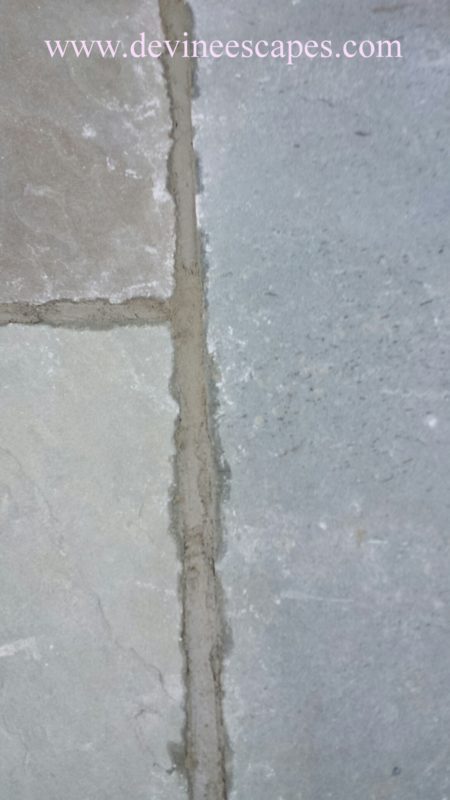
And look at that–you’ve just filled in-between you flagstone with new cement! I always believed in you.
Essential tools needed:
- grabo, vacuum lifter that makes lifting and placing flagstones a bit easier. My review can be found HERE.
- dead blow type mallet. Many types to choose from….lately I mostly use my rawhide mallet, but the rubber headed modern style .deadblow is in my tool bucket too, and I’ll use whichever is closer on hand.
- brick hammer, for cutting flagstone.
- Angle grinder. Same one I use. Keep this on hand for cuts that the hammer won’t successfully make, or that will take too long with the hammer
- Diamond blades.
- Brick chisel.
- Knee pads–absolutely essential.
- diamond trowel
- tuck pointing trowel
A note about the mortar.***
I like to use a fairly dry mix of mortar for this type of work. Masons call this a “stiff” mix, or a “tight” mix. I go just a tiny bit wetter than crumbly…well, maybe a little bit crumbly. This makes less of a mess, than wet mortar will. Also, since the cement is fairly dry, I can really push it down into them cracks. With a wetter mortar, if you push it down hard, or even just go to smooth it out too much, you’ll push the moisture up to the surface–which will cause problems, such as spalling and cracking, later. Drier stuff is easier to clean and will be stronger. Years down the road, this patio will still be in good condition.
But despite the nice dry mortar that I used, there’s still a bit of mess to clean up. Ideally, I’ll do a quick clean right then and there, while the mortar is fresh.
***I need to go back and edit this post with photos and description of my current method. First I need new photos! Anyway, I’ve discussed re-pointing flagstone and other paving with other masonry contractors…I partially wrote this article in order to present my method, self taught, to other masons and see what they had to offer. Since then, I’ve modified my technique. I’ve been experimenting with using much more dry mortar. This cuts way down on the clean-up time. Use really really dry mortar. Just add enough water that the mortar all looks darkened, but is not actually damp. Pile it up around the joints, one foot or so at a time…..work it into the joints with your tuck pointer…press it in really good…..my old way, the way outlined above works fine–but I believe the really dry method provides just as much strength and durability and much less clean-up.
UPDATE: my new method of re-pointing flagstone is described here. Basically it’s the same as before, only with a much more dry mortar mix, firmer pressing-down with the narrow trowel, and much less extensive cleaning afterwardsc
Other methods that I have encountered have varying degrees of ease–but do not provide much durability. I do NOT approve of any methods that use a) too much water, or b) is not compacted enough, pushed down into the joint really well. The mortar, whether you are using the super dry method or and other dry method, must not be plastic. It can be bone dry, crumbly, or slightly damp…but it must be more dry than a block laying mix. The cement you use to lay a cinderblock is just way too wet for grade level application.
Another super dry method involves just sweeping the mortar into your joints. I know guys who fit their dimensional ((pattern-cut)) as tight as possible, with 8th inch or less gaps–and then they sweep dry mortar mix into the joints and then lightly mist it. Later on pressure washing any haze. This method is easy….but since the mortar never gets pushed down into their, never gets properly compacted…I’m just not feeling it. Not my style. Will crack up.
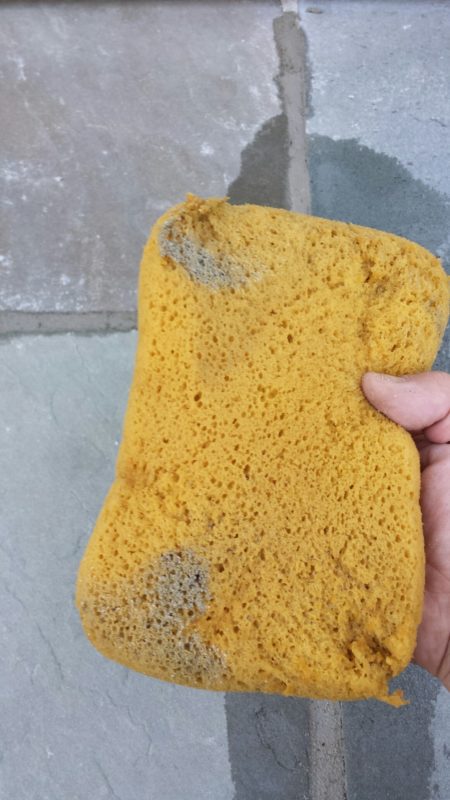
Sponge technique is important!
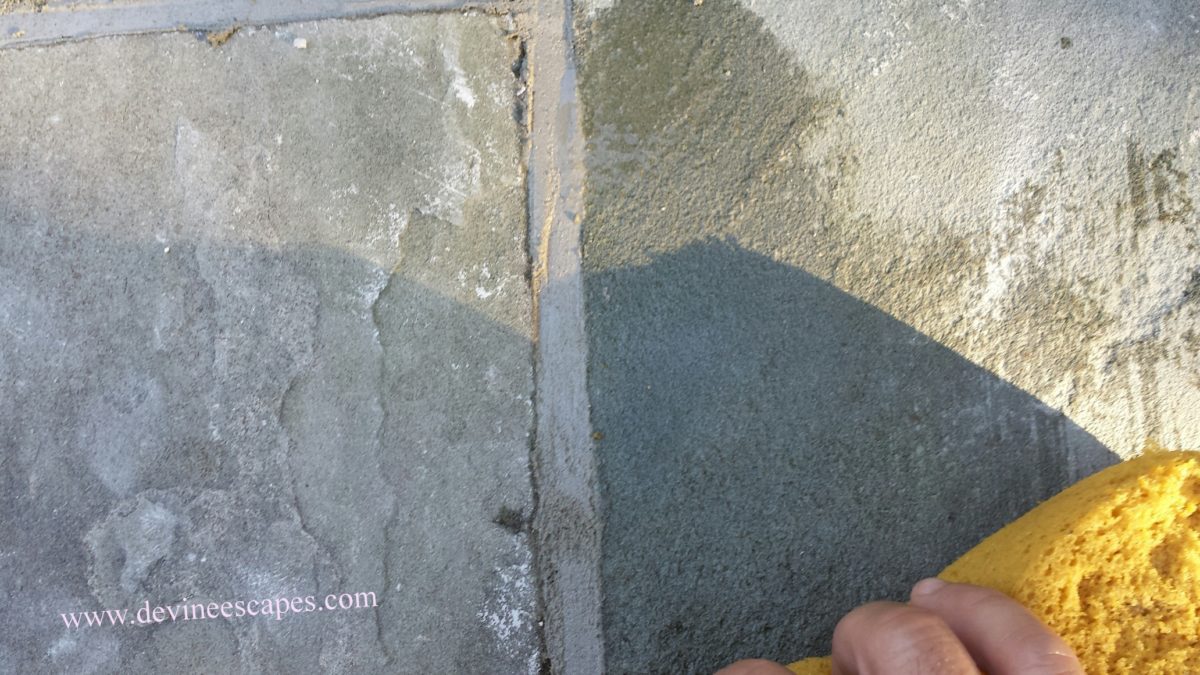
(okay, so this photo was taken later, not when the joint was fresh, but you get the idea)
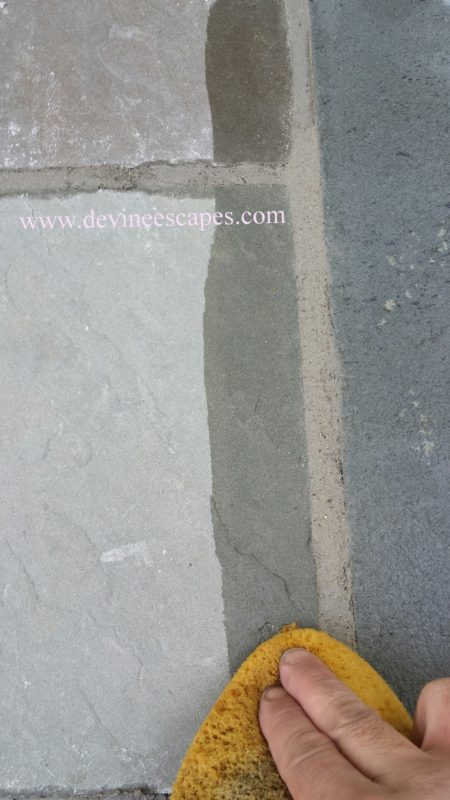
Take your grout sponge and dip it in water–then squeeze it out real well, you want a rather dry sponge for this. Take one corner of the sponge and wipe down the one side of the flagstone mortar joint.
Then, use a different corner of the sponge and clean the other side of the joint. Okay, now you’re good. move on to other work.
When the mortar has become thumbprint dry you can return and sponge it off again.
So do some other work for awhile and return to the newly filled flagstone joint a couple hours later, or however long it takes, until when the joint has become “thumbprint dry”. Heat and humidity and how loose or tight your mortar mix was will determine how long this takes….on a perfect 70 degree day, you may be able to work all morning, filling the joints with mortar, and then after lunch you can go back amd sponge off the joints a second time. This is because your first pass with the sponge, when the joints were fresh, got up the majority of the spilled mortar. To try and get it 100 percent clean when the mortar is fresh…will make a mess.
So sponge it off again…see them little white spots on the left side of the mortar joint? That’s what we want to clean off.

Hit both sides…..again, always using a clean corner of the sponge! Use the same corner twice and you will leave a mortar haze.
Use one corner, then the next. I really mean it. Always use a clean corner, or side, of the sponge.You can buy grout sponges like this, here.
Even when your bucket is full of dirty looking water, that’s no problem–just dip squeeze that sponge dry and then use it, one corner at a time!

Then, I like to actually sponge off the mortar joint itself. This will smooth down any trow marks and leave you with a much more consistent looking mortar joint.
Sponging down the joint itself (when it is thumbprint hard) will also fill minor gaps that you may leave behind with the trow. Look, I’m pretty good with a trow–but still, little tiny spots can get left, little voids, about one quarter the size of a match head…little spots, usually along the edge of the stone, not in the middle of the joint. These are spots where water can infiltrate, and cause a mortar joint to fail, sometimes within just a few years. Worse still, that water could even get underneath your flagstones, cause thing to pop up and come loose.
I’m not really sure how many masons use a sponge technique like I do. What I do know however is that when I come in to repair these jobs, I always find little tiny gaps in the mortar–little tiny gaps like the ones that I myself sometimes leave behind with my trow–but that I always correct, with the sponge.
***again, the sponge is used a bit less, if you go with a super-dry method.
The following photo is of the same patio, In Ambler Pennsylvania, as the one I showed you way up at the beginning of the article.
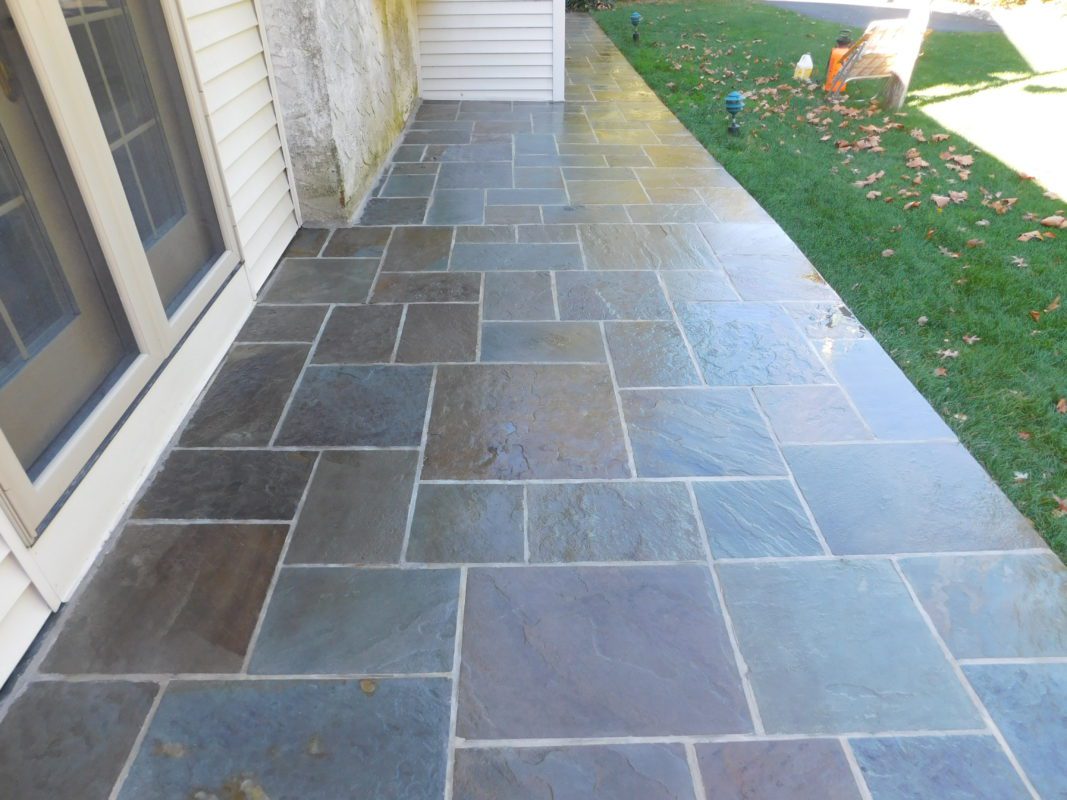
Tada! A once weathered and deteriorating flagstone patio, like new.
Thank you for taking the time to read this article on how to repoint flagstone patios. Now go forth into the world and repair some old flagstone patios, like a pro, like a real stone mason. Like Devin Devine.
Thank You
Please note, that if you need individual help with your flagstone project, I now offer DIY phone consultation services.
DIY Hardscape Help
Phone Call Rates:
$80.00 for a half hour consultation.
$115.00 for a full hour.
These consultations can also be conducted via email.
Monies are payable via paypal.
Related articles, DIY and hardscape how-to:
-
- how to build a dry stone wall
- how to build a flagstone patio
- pre-winter yard maintenance
- how to build a natural stone birdbath
- what to use for under flagstones, concrete, sand, gravel, or what?
- should you seal your stone patio?
Also, check out my sculptural forms in blue stone and slate:
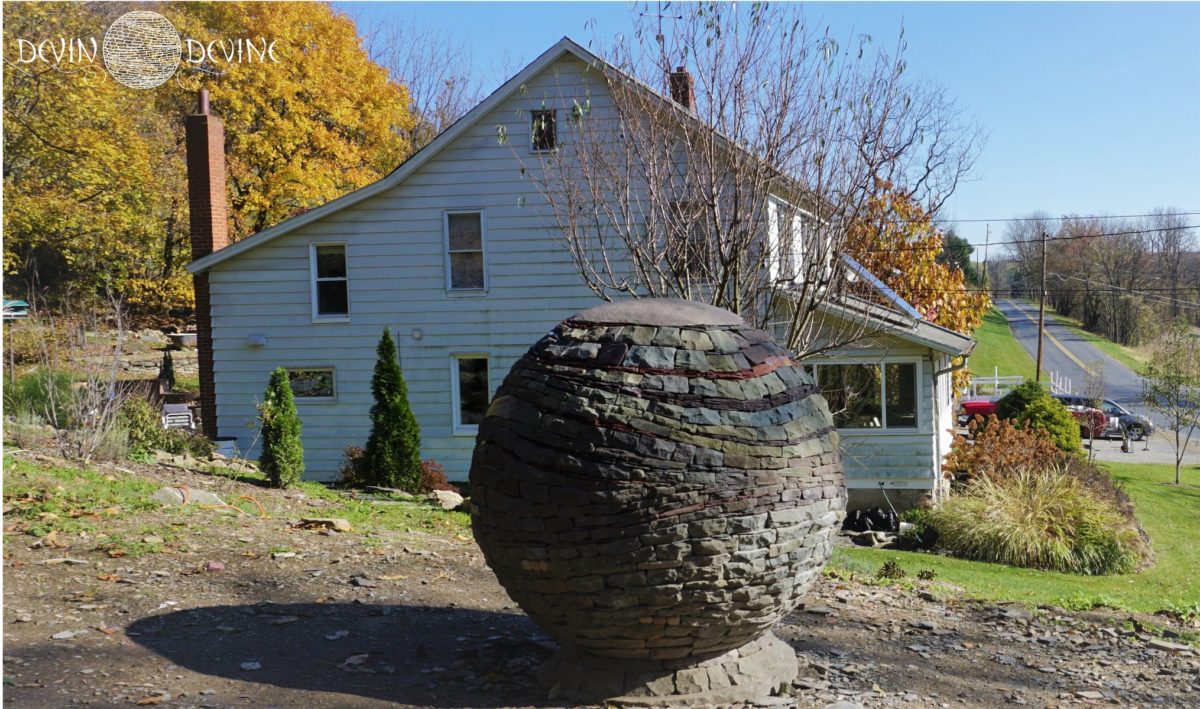
Stone Sphere, private commission, Lehigh County Pennsylvania
Thank you fir this valuable information I am about to tackle a big repair job.
You’re welcome, thanks for the feedback. Good luck with the flagstone repair!
What about sealing the flag stone and motor once it’s all cured?
I wouldn’t recommend sealing any grade level masonry. 1. it can make the flagstone slippery and 2. it can trap moisture. Once the top of the stone is sealed, the bottom of the stone and mortar are both still porous and can take on moisture from the ground–but now that water can not be shed through evaporation. This can potentially cause problems.
What about the breathable type of sealant? Is that okay?
I still wouldn’t recommend it. I’ve addressed this issue here: https://www.devineescapes.com/should-you-seal-your-stone-patio-ask-devin/
Thanks!
You are a saint! Awesome instructions. Thank you so much. And I understand that I should NOT seal my bluestone patio? One of the comments referred to that. Thanks again Rick Voit
Yes, the thing with sealing stone is that you seal the top of the stone but water can still get in, from underneath, but now it has no way to evaporate.
Hi, Our flagstone patio grout is more broken up than the image you show here. I’m sure moisture was seeped down underneath. Is it worth spending the money to repoint it? It’s a large area and I’m certain it will be an expensive project.
Thank you!
Sight unseen, I really can’t say. Re the stones themselves loose, or just the mortar in-between them?
Usually repairing is much cheaper than replacing and a patio needs to be in bad bad shape, before repairing is just not worth it. Having said that, a repair doesn’t have much value, unless it is carried by a skilled stone mason.
Good luck 🙂
I have the same issue with moisture. What did you end up doing and how did it turn out?
What brand and mortar mix would you recommend to use ?
I do not endorse any manufacturer of mortar or cement products. No brand recommendations. For re-pointing flagstone, I go with type S mortar.
Hi, how long who you estimate a job like that would take but 250 square ft? And how much type s mortar needed? Thanks.
2 days of grinding and chipping, 2 days of repointing. Depends how wide the joints are… Maybe four bags of Type-S mortar.
Nice article!
What ratio mix , sand to type S do you use for the joints ?
2:1 ?
If you have a bag of mortar that says type S, then it already has sand added, just add water. To make your own type S: 1 part portland cement, 3 parts sand, 1/2 part lime. For repointing flagstone, anymore I just use premix, adding dye if needed to match existing mortar.
Thanks Devin for the tips. I was about to repair a few gaps in my pool surround and then I read your “keep it dry” grout recommendation. I also went out and bout a tuck pointing trowel. Appreciate your advice.
In addition to loose joint mortar, a couple of the flagstones are wobbly. I think that is because they are resting on a base of sand. Should I lift up the stones affected and relevel with more sand?
There’s too much here that I don’t know. There’s cracked mortar and the flagstones are on a bed of sand. So….was the patio built on a base of sand and then the joints mortared? That’s not the right way to build a stone patio. Or, is the stone patio is on a concrete foundation and the mortar between the stones has cracked, while the mortar beneath the stones has crumbled up and became sand? This happens often, when the mortar joints on a stone patio crack, often there’s a few stones that have mortar beneath them that has degraded and become sandy. In the latter case–lift up the stone, clean out the loose mortar/sand. Remove enough material so that you can re-set the stone in about an inch of mortar. In the former case—there’s probably a few things wrong (too thin stone probably, too wide joints I bet, also stone dust is better than sand, for leveling flagstones) and the remediation may be more complex. Have a pro look at it, Set up a phone/email consultation with me, in that case. Hope that helps!
Devin,
First, great Blog!
I have a 1253 SF bluestone patio set on concrete in 2004. Most is uncovered and gets pounded with sun in summer and is totally in the shade in the (cold) winter.
Original material was Type M mortar mixed with ‘red’ sand, providing a beige color. Re-pointed by different mason three years ago with gray mortar (not sure what type) and match was awful. Now, about 20-25% of the patio has cracked mortar and a bunch of loose stones. Areas under decks looks brand new.
Questions:
1. What is the best way to match the existing mortar?
2. What is the best method to re-lay the loose stones?
3. With this much cracking, should I consider a total re-grout?
4. What type of sealer do you recommend for this?
Thanks in advance!
Rick,
1. I show up with brown and, yellow sand, white sand. Grey Portland cement, sometimes white Portland cement to. I experiment with different sand combinations, to try and get the best match…let samples dry. Check them. Tip! You can mix up a sample, then compare it to the old mortar–dampening the old mortar will give a better comparison, so you’re not comparing dry to wet. But let it fully dry to be sure. Also, be aware the new mortar will get lighter as it dries….then get a degree or two lighter still, over a few days/week.
I also bring a few colors of die, brown, yellow, black, to dial in the color match to perfection.
2. Set up a phone consultation to go into detail about things like this….clean out old mortar, get it nice a clean. Complicated project…you might do well to hire a pro, or set up a 60 minute phone consult with me….or keep reading articles/ watching videos.
3. 25% is on the line. Either redpoint the whole thing, or take your sweet time with the color matching.
4. No sealer! Unessesary and can trap moisture. Underneath, it is absorbing ground water, but it cant evaporate. Might make flagstone slippery. No evidence that it helps longevity. Sealer not recommended for grade-level stone work.
Good luck and I hope that helps!
Thanks for this – really great. My patio just has a few 3 to 6 inch joint gaps where the mortar has cracked and comes out after just power washing…maybe 10 or so on a 20×30 foot patio….how much of the existing mortar do I have to remove ? Clearly anything loose but I dont want to create a huge job. Thanks Fred
Can’t say for sure without seeing the patio, but it sounds like you have maybe 1-3% of the joints failing. If I’m looking at a patio with a small percent of joints failing, I’ll usually end up recommending that the loose material be removed, anything cracked be grinded out and patched as well. Really, every job is different and I can only offer general guidelines, at best, as there is BUT, generally speaking, I’d replace the loose stuff, cracked stuff, and I’d look for anywhere where the mortar has separated from the stone at all, at patch those areas too. Good luck!
Wow I wish I could show you my slate patio. As far as I can tell it was not done properly. It was done by the previous owners. Some tiles aren’t slate I’m sure as they have basically disintegrated over time. Looking at trying to fix it as it does look nice in some spots. Are the tactics you use here similar to what I could do to fix my patio? Can I make a quality repair with out starting from scratch? Thanks in advance.
I really couldn’t say, without seeing the job. It sounds like a complicated fix, one that you probably should seek out a professional for. Consider hiring a professional. If you just want a professional opinion and advice before going DIY, then I do offer phone/email consultations:
https://www.devineescapes.com/phone-consultation-professional-hardscape-help
I have to fill in the gaps and repoint my walkway. I am reluctant to use mortar again as it crumbled due to the climate in Canada. Can I use a cement instead and if so what grade is recommended
Is your walkway on a concrete foundation? If so, use mortar (which is made from cement and sand). If your walkway is on a grave base, then use stone dust/quarter inch minus/pathway fines/whatever they call the stuff in your area.
You’re just what the doctor ordered. I have an old (50 plus years) flagstone patio – natural flags – large and small. They are set on concrete. Just about all the joints are loose and have filled in with dirt and many weeds….so my thought is to scrape them all out, pressure wash the whole thing and then repoint with cement. I’ll send you a before and after pic – have been wanting to do this for years and now maybe i have the time. Thanks for the informative blog.
From what you’re telling me, you’re going to have some–or a lot–of flagstones that are loose. When you removed the old mortar, you’ll find flagstones that are loose, and will need to be re-set in mortar. Looking forward to the before and after pics. Good luck!
I’ve recently had a flagstone patio installed and while most of the job went well the two sides of the patio mortar dont match. One side is a preferred light grey and the other is a sandy color. Im estimating at least 250 sqft does not come even remotely close. Would you request the contractor to come back and redo all of the mortar that doesnt match or just deal with it? I can forward pics of youd like.
I do not believe that I am qualified to act in a mediating or arbitrating capacity. Sorry, but that’s how this question sounds, to me and I don’t think I can offer much help. Talk to your contractor.
If it were me…..I wouldn’t install a new wet laid patio. Go dry lay. Seriously. Read some posts http://www.devineescapes.com –good, qality stuff. But if I was repairing a mortared patio (something that I do often, because they often fail) then my mortar would match. And if there was an coloration issue, I’d sure want my client to ask me about it. Talk to your contractor.
Good luck and I hope this works out for you.
Hi thank you for this post. I was wondering, if a lot of mortar is still in good shape I can leave that intact and only remove crumbly broken parts?
Thanks!
That depends. If more than half of the mortar is crumbly, then I’d just remove all of it. If less than half of the mortar is broken up, then you can leave the good stuff where it is and just remove/replace the broken stuff. Color matching will be an issue though. New mortar tends to be white/gray, whereas the old stuff is probably a yellow/gray/brown. Buy some dye and pre-mixed mortar– or go all-out and buy portland cement plus different types of sand and maybe some dye too–and mix up some test batches. Spread a small bit of each batch on a piece of cardboard and set in in the sun to dry fast and give you an idea how close the color match is. Good luck!
Thank you for your very informative guide. I had my patio re-pointed last year. The mortar is flaking off. This started shortly after the repair, prior to winter or bad weather. He ground the old mortar out, pressure washed it and cleaned it then re-pointed it. He used a masonry cement type S white mortar and added flex con. The mason, who also repaired a sandstone walk without any issues, doesn’t know why the flagstone repair isn’t holding up. He will redo the work, but we don’t want to repeat the problem. Do you have any suggestions? How long should a repair last if properly done?
I generally wouldn’t add any acrylic type agent to my mortar mix for a re-pointing job…but then, the addition of an acrylic additive should not cause this type of situation.
a) wash out the joints really good before re-pointing. Grind/chip out the old joints, then sweep, then leaf blower, then hose–then repeat the blower and the hose again. Or multiple passes with the hose if you don’t have a blower. Mortar will not stick to a dusty surface and dust can hide, down in them cracks between your walkway/patio stones.
b) don’t mix your mortar too wet. Mix it dryer than you think. Sometimes I mix it even dryer than “dryer than you think”, and mix it so it’s still powery, only barely damp, and only sticking together when pushed down into the joint with pressure. Soupy, over-wet mortar will flake up. Like-wise, a only somewhat damp mortar will flake up if over-worked. You work the surface of that mortar with your trowel too much, and you will bring all the moisture to the surface, making the surface mortar over-wet…and over-wet mortar will flake up.
Hi Devin. I have a question regarding flagstone steps. The mortar on most is loose and the mortar on one of the risers has crumbled. One stone on a flat landing is loose and wobbly. Can I use Type S to reset the loose stone or would I use Portland cement? Thank you for your time.
Andy
You want to use type S, which is made from portland cement and sand. Straight portland cement wouldn’t work.
Thank you Devin
What a miracle that I stumbled across this post! I was about to destroy my patio without knowing that the joints shouldn’t be sealed! It never ocurred to me…so – I just sealed the entire patio in order to keep the new grout from staining. I sealed the old grout as well in this process, so it looks like I need to act fast. I’ve never heard the terms ‘pointing’ or do I know about different grades of mortars. I guess I have my work cutout. Not something I’m looking forward to…however, sealing the stone didn’t make it slippery at all. If I can suggest adding a handful of playground sand to the sealer to keep it from slipping…it works. Just a bit as you go to add an element of grip. Most of all – I really want to thank you for your post. You saved me from destroying my 650 sq foot…4 yr old patio. A $70k patio when you add in the waterfall. I owe you!
I’m glad I could help–and thank you for leaving a comment to let me know 🙂 I use type S mortar, for grade-level pointing. You can buy premixed type s mason’s mortar.
Hi I followed your advice and bought a bag of Sakrete Mortar/stucco mix type S at home depot. After using few times I feel there is too much sand to produce a smooth joint surface.
If I am using the wrong product, what should I pick.? Should I make my own mix of portland and sand? Thank you
You could…but the proper mix of sand to cement stays the same. And in my experience, pre-mixed bags usually have too fine of a sand, if anything, not too course.
Idk…how smooth are you looking for? Wetter mortar is easier to get rather smooth, but I don’t do that, myself, as wetter mortar is weaker. More water when mixing, equals lighter/more porous weaker when dry.