how I build a dry stone wall
Devin Devine, Stone Man
610-301-4269 devin@devineescapes.com
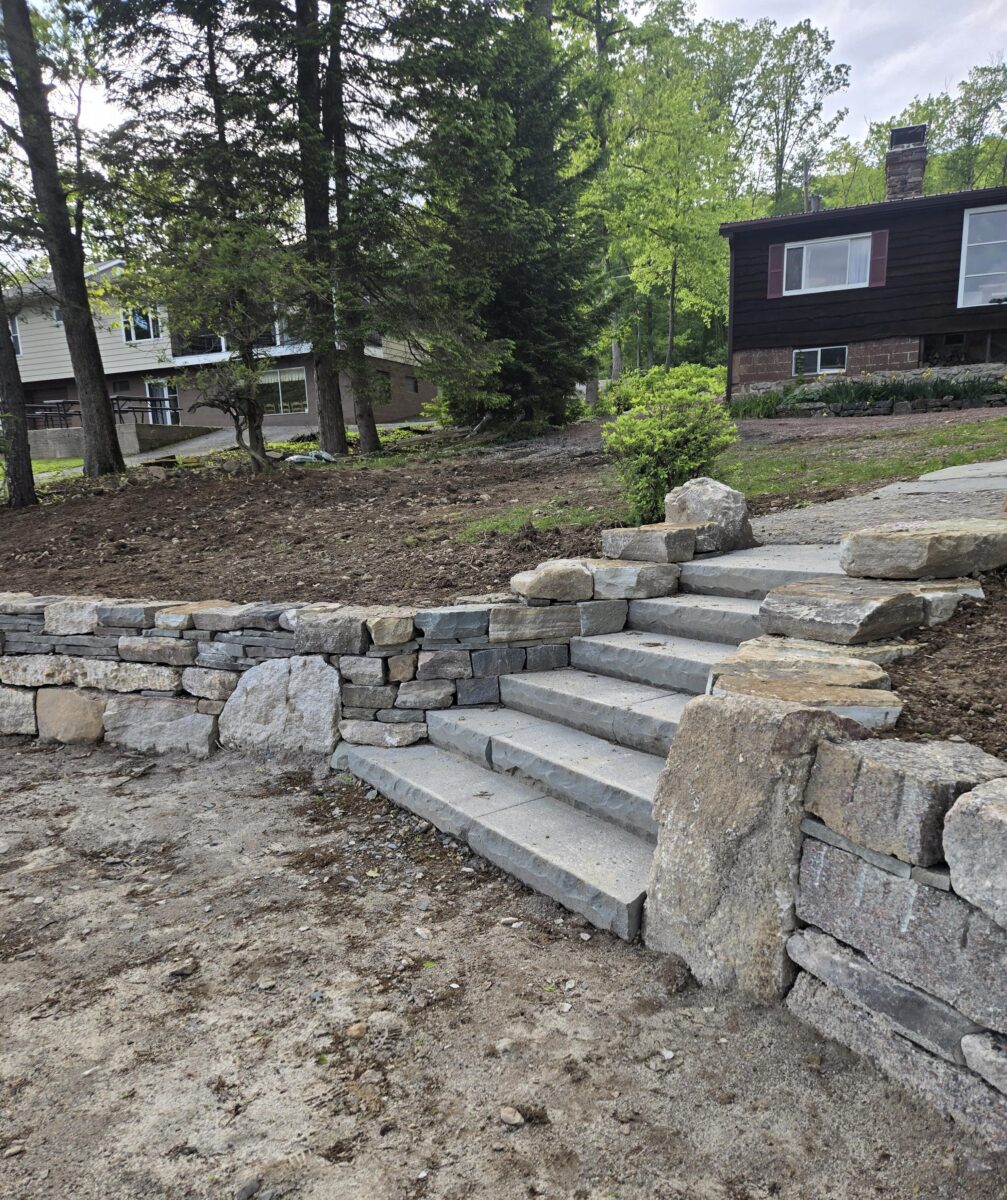
How to build a dry stone wall, summed up in one sentence: build it thick, double-faced with the length of the stone set into the wall,with plenty of through-stones, with well-packed hearting, no vertical joints, wider at the base then at the top and with heavy cap stones that span the width of the wall.
DIY stone wall and hardscaping help
My rates for DIY phone/email consultations/video chat consultations are as follows:
$138.00 for a one hour consultation
$85 for half an hour
Monies are payable via Venmo or add $5 for paypal
This article is going to be an overview of dry stone wall building.
A fairly comprehensive guide to how I build dry stone walls. This will serve as a helpful resource, for contractors, aspiring artisans and DIY homeowners as well. I’ve been at it for some decades now and I can tell you two things:
- My walls hold up
- In this article I will tell you everything about how I build walls, from foundation to cap stone.
The TL/DR is summed up by the following bullet points:
- build it thick
- Double-faced
- set the length of the stone into the wall
- plenty of through-stones
- well packed hearting
- no vertical joints (one over two, two over one)
- cap spans the width of the wall (cap stones are also through-stones)
^That’s about all you need to know. But I will elaborate further.

dry stone wall cross-section/diagram
Related content: lifting heavy stones how to move large stones without heavy equipment
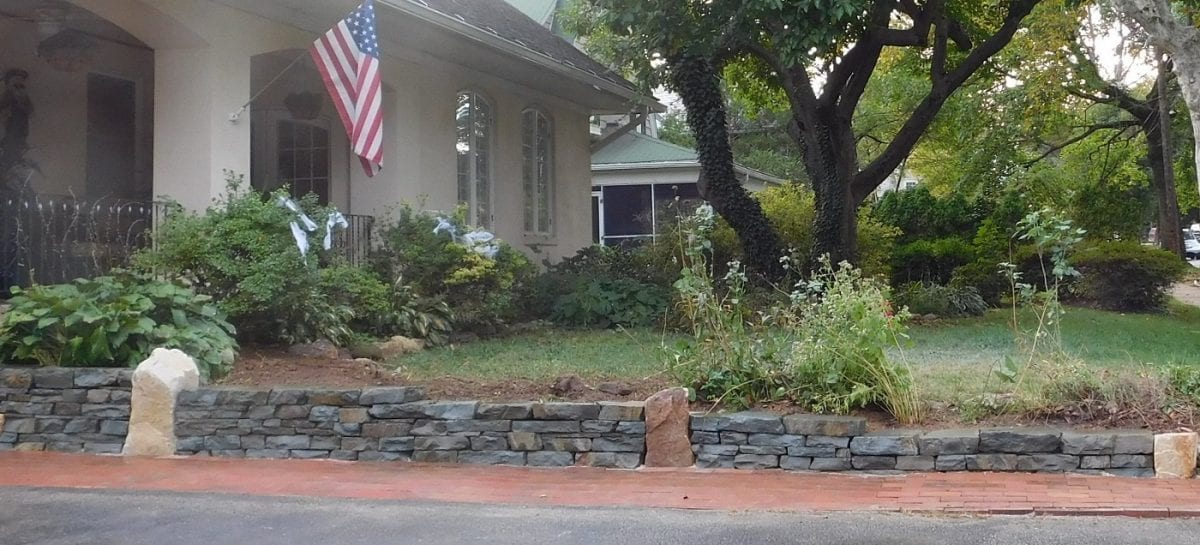
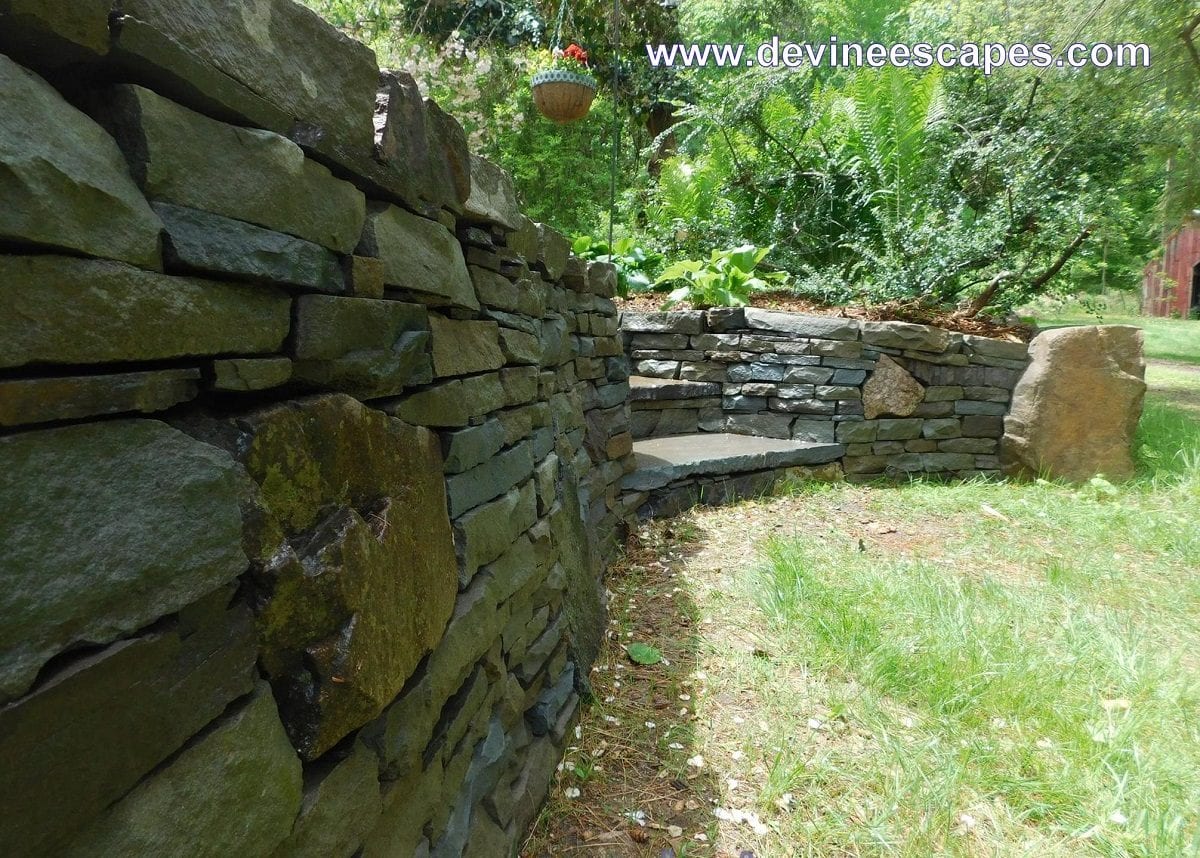
double-faced (AKA “double-skinned”) dry stone walls

Coursed masonry, with random jumpers and half courses.
Feel free to hit up the TIP JAR buy me some new hammers.
I build my walls thick, and double-faced. They don’t fall down. When I go in to repair/rebuild someone else’s stone wall….it’s usually single faced, only one stone thick, with rubble and soil behind it. Or gravel-filled.
- foundations
- drainage considerations
- organize your stone
- corners and cap stones
Foundations for dry stone walls
Dig down about 8 inches or so, removing all organic matter, dark colored soil and roots, then compact the subsoil. Next, rake out approximately 6 inches of roadbase gravel and compact that. Both the subsoil, and road base gravel may be compacted with a hand tamper or a vibratory plate compactor.
Drainage considerations for dry stone walls
No need for fabric, gravel, or pipes behind your wall. It’s dry-stone, right? Water can flow right through it. Just build it thick enough and well-hearted. Fact is, I used to run a pipe behind my walls, the way paver guys do, creating a drainage system, behind their landscape-block walls. the walls I built with fabric–13 years ago–still stand. The walls that I’ve been building for the past 11 years, with no fabric/gravel/pipe behind the wall–these walls are also still standing.
Essentially, we can find no reason to use fabric/gravel/pipes behind our walls, no benefit, but some potential problems.
- All that gravel behind your wall can potentially hold a ton of water, creating the hyrdrostatic pressure that you were trying to avoid
- imagine little bits of gravel, all piled up behind the wall–migrating their way into the wall. Like ball-bearings, like a bunch of ball bearings in-between your wall-stones. Nope! (back when I did used to use fabric and gravel behind my walls, I was careful to avoid this eventuality….it CAN be done without causing problems. But again–it is entirely unnecessary and that sounds like a gamble with nothing to win, but plenty to lose
- the people who use fabric/gravel/pipe behind their stone walls are usually paver contractors, your typical hardscape contractor who does pavers and maybe a bit of stone. Often, you’ll see failing walls with gravel pouring out of them–either they build a single-faced wall and just back-filled with lose gravel (bug no-no) or they built the font of the wall, built the back of the wall and then infilled with ball-bearings, I mean gravel.
Organize your stone
You have through-stones, corner stones (quoins) and cap stones, wall-stones, larger rubble and hearting.
Cap stones
Cap stones and corner stones first. You want your cap stones to span the width of the wall, and be fairly heavy. Sort out all the stones that are of appropriate size. My ideal cap stones are usually right around 14 inches deep (the width of most of my walls, at the top) and 4 to 6 inches thick, varying lengths.
Corner stones and wall ends
Corner stones and cap stones are often interchangeable–if I can’t find the right corner stone from my corner stone pile, I’ll have a look at the cap stone pile. Corner stones are going to be larger, square stones. I prefer most or all of my corner stones to span the width of the wall….so if the wall is 2′ wide at the base and 14″ wide the cap…then I’ll be looking for heavy stones of about those sizes.
A boulder may be used, in place of a built corner. This can be done for aesthetic reasons, to economize on perfect corner/cap stones, to save on the labor and trouble of building the corner–or just because you happen to have some decent boulders on hand.
Is a boulder corner stone/end stone easier to set or harder to set, then to build a traditional wall-end/wall corner? I don’t know about that. For the boulder, you need to dig deep and/or set in concrete….might need some heavy equipment and/or some pry bars/levers/rollers and strong back(s), to get the boulder in place. An eye for beauty and form comes more into play too, in my opinion…if you’re bringing a boulder into the mix in a stacked stone wall, the boulder will stand out as an accent piece. As such, you want it to look good.
A built corner too, takes care, and also takes the best of the best of your available stone–I say that because the stones that I usually use, for my built corners and wall ends–are stones that could be used as cap stones, or through-stones. They span the width of the wall, are on the heavy side and would make good cap stones and they are also square, or can be made square easily enough.
For me, the choice between a built corner or wall-end and a boulder–is just aesthetic preference, which changes job to job, site to site, and is also influenced by locally available and on-site materials.
Through-stones
Through-stones are stones long enough to connect the front of the wall, with the back of the wall, tying it all together and giving the wall much of its strength.
Face-stones
Face-stones, here refers to wall-stones that will look good and are large enough, to be used in the face of the wall, but that are not well suited to be used as corners, caps, or through-stones.
Generally, you want the face stones to be set with the length running into the wall, rather than out across the wall. The walls that I’ve repaired have usually (almost 100% of the time) been single-faced walls, with the length running out across the wall, backfilled with rubble and soil, or even worse–gravel.
Larger rubble
If you’re building a retaining wall, then larger rubble, funny-shaped stones and stones without much of a face on them, can be used in the back of the wall, and doesn’t need to be pretty, just stable.
Hearting
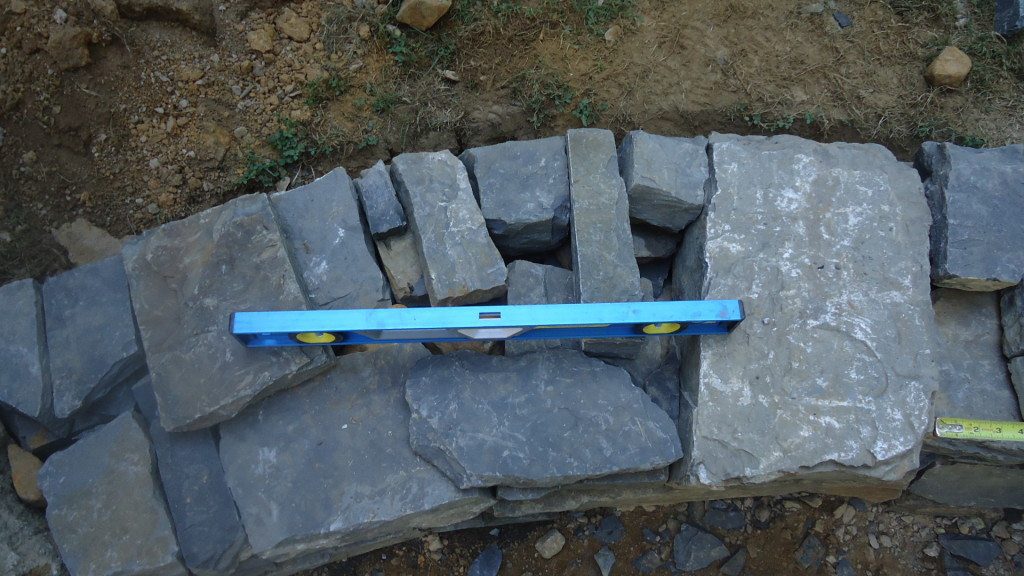
Hearting in made up of smaller rubble, stones too small to be used as a stable face-stone. Chunks of stone. You don’t want to fill your wall with little gravel sized bits. Don’t shovel your hearting in to place. Fit them stones nicely–this is the heart of your wall.
Usually, we create a a bit of hearting by cutting stone to fit, usually just with a hammer. Various chisels are in stand-by, the grinder’s not too far and the gas saw is usually with me, although it’s rarely used on a dry stone wall job.
How much stone trimming, shaping and cutting is done on a wall depends somewhat on the stone type, and also on the job–where is it located? Is this a pretty wall, part of a garden or patio? Or is it retaining a hillside and needs to be strong and look good, but won’t be seen from up close. Also, what type of stone is it, and how is it sized? Many types of stone cleave off in nicely planed pieces, and can be knocked into a square shape with just a few whacks with the hammer.
Now that you’ve got your foundations in and your stone organized….get stacking! Remember to stretch and hydrate! I will update this article (soon enough) with more progress photos, some notes about stone cutting, and some guidance for how to do the who stacking part.
Afterword
As far as hammers go, you’ll at least want to have a rock pick and a 3-pound mini-sledge, maybe a mash hammer. For chisels, start out with a tracer…or even a 2″ wide steel brick chisel.. If you stay with it for a couple years or longer, you’ll eventually want a hand-set (lately it;s starting to become my favorite chisel) and maybe a point.
You’ll also want a dead blow mallet, for setting the base stones. Lately, I find myself using a rawhide type dead blow mallet, such as this one right here.
If this is your first time building a dry stone wall, then I hope this article has been helpful and I especially want to encourage you. Follow a the rules–stretch and hydrate (all else are mere guidelines) organize your stone, and build yourself a stone wall.
Hopefully I’ve been a decent teacher, but listen carefully to the stone and you may find that stone itself is the best teacher of all.

Follow me on all social medias @devineescapes. Email me if you’d like to set up a consultation and if you like to donate you can click HERE to Support my work
Devin Devine, your hardscaping guru(tm), is a stone mason and sculptor, a magical man, based out of the Pocono Mountains in Pennsylvania.
If you’re still not a believer in dry stone walls, maybe this round wall will help. Dry stone sphere, built in 2013, photo credit Linda McCarthy, 2021
Devin – you are a highly knowledgeable “saint”. If i could just find 2 workers to help me I’d get this done! The hill is very stable. I’m thinking if I just swale it behind the wall and run any runoff out that way,I’d be fine since it’s a heavy clay sediment. Also, it is 20 foot diameter so I’m sloping approximately 2 1/2″ from hill side to low side. That works correct?
I’m going to use 16-24″ Delaware round boulders for a 2 layer backdrop and perimeter. Question – Would you use 3/4 clean stone, QP or just the earth (clay/rock) to batter and back up the short wall? Perhaps a combination of the dirt and clean-stone? Any opinion on this would be great! Thanks again!
Also, If i’m using the 6″ of roadbase for the full circumference, should I start my first course of boulders in the roadbase or just on the solid virgin clay/dirt? Was also toying with using smaller boulders or maybe belgium block as a circumferential edging around the full perimeter as I’ll be starting high at the apex of the circle with the boulders and tapering them down into the front. Any thoughts on this would be invaluable. Your work and creativity is remarkable. Thank you again!
One question I’m pondering. If I am using round/oval delaware boulders, should I double wall the base? My plan was to go approx. 2 courses high or approx. 20-24″. It might make sense to go with a double boulder base and stack the second tier on th 2 below. Your opinion would be great. I’ve not seen much on building with round boulders but I like the softness of how they look. Thanks again.
Apologies – I’m reading the post on how you build your walls. I see you’ve already answered some of these questions.
Thank you for re-posting these questions on the appropriate post.
A swale behind your dry stone wall should work. I’d need to see photos to be sure, but that’s how I would usually handle this kind of situation.
I go with a quarter inch of slope per foot…which equals 1″ per 4′ (helpful when I’m checking the work, with a 4′ level) or 2.5″ over 10′. These are approximate numbers, 2″ over 10′ is fine (less than that and I worry about puddling) 3″ over 10′ is also fine, but more than that and it begins to feel like you’re on a hill.
I backfill my walls with soil, clay and rock will be fine. If you backfill with clean gravel…..that can create problems. Small bits of gravel may migrate into the wall. That’d be like in-filling your wall with ball bearings. As the wall shifts, slightly, over the years, these ball bearings can cause previously stable stones, to become wobbly. Also, clean gravel behind the wall just creates a void space for water to sit, which can actually build up pressrue and bring a wall down. I never use gravel, unless there’s going to be filter fabric involved, and a 4″ perforated pvc pipe to cart that water away.
I build my walls on the same sort of foundation that I build my patios on. 6″ of compacted roadbase aka paverbase aka 3/4″ minus.
No need to apologize for posting questions that are already mentioned in another post. This is an artisan craft we are discussing and not a simple task. As such, clarity, and hearing the same answer twice but worded differently, can be quite helpful.
Devin – Truly “Artisan” work. I enjoy it immensely. The last question was concerning round 15-24″ Delaware boulders. Do you think 2 boulders wide on the base is best for stability? It is a potential waste of boulders since one would be behind the front wall but stability is key as we all know. Any opinion would be great! Thanks again.
2 boulders wide on the base is what I’d do, with smaller rubble placed (not shoveled) into the space between them. Or, a larger flatter stone, one that’s as wide (or wider) than the entire wall. In either case, I’d have a couple inches of the first course buried. Most of my walls involve flatter faced stones….so, if working with boulders like this, I’d set aside uglier, less well-shaped boulders for the back face of the wall, and the prettier faced ones for the visible wall face.
Thank you for this information. It is invaluable.
My question pertains to rule number 1 “Build It Thick.” One of your above pictures shows your wall in the middle of the build process. It seems like you have made it thicker in areas where it will eventually be higher and thinner where it won’t reach quite as high. Do you have a general rule of thumb you use to determine how thick? I intend to build a dry stone retaining wall that will be as short as 2 feet tall, with the majority of it being 2.5 to 3 feet tall.
Thanks.
I usually will have 3″ of set back, or batter to my walls… Usually prefer to have a 14″ wide cap, though this may vary.
So for a 2′ high wall, with a 12 to 14″ wide cap, the base will be 24 to 26″ wide.
The wall grows 6″ wider for every foot of height.
3′ wall will be 30″ to 32″ wide at the base.
I’m so grateful for this blog, thanks for the inspiration and instructions!
I can get 4-8″ quarry spall for less than cast concrete, and I want to build an 18″ high wall and fire pit. Using rock would be a LOT more work but I think it will look far better, and it’s more economic.
Because the wall will be so short, I am thinking that I can get away with spall, but I’m worried about through stones and cap stones. Do you have any advice for me? I can’t find a local quarry that sells 1/2 man rock, the next size up is a mix from 50 -200 lbs.
A wall can be built with that material…but as you say, you will be limited/lacking in decent corner stones, caps and through stones. I’ve seen good walls built with material as you describe–but decent sized and square-ish corners and caps were used, too. You say you’ve checked out the local quarries–but what about masonry suppliers and landscape supply places? Traditional field stone wallers would build with what’s at their feet–using stone that got dredged up when the land was tilled, to make border walls, and walls to keep sheep in place. In such a situation, you use what’s there and maybe don’t have nice cap stones or throughs. Personally though, I’d probably find the larger stones….might have a look at that 50 to 200 pound material you mentioned.
Hey Devin,
I live in honesdale, do you know where I can get capstone to finish my blue stone wall
Ryan,
So I don’t know of anyone who sells stone that has been sorted specifically to be used as dry stone wall caps. For me, I want a cap stone from 4 to 6 inches thick, around 14 inches deep (well, depends how wide the top of your wall is….but, as mentioned in the article, I want my cap to span the width of the wall/no piecemeal capping) and 10 to 20 inches or so long.
If I were building a bluestone wall in Honesdale, I would go to Scranton Materials and check out their 4 to 6 inch colonial gray wall stone and/or their colonial gray garden steppers. The garden steppers are stones intended to be used as landscape steps. They tend to be larger than the 4 to 6 inch wall stone, and being larger gives me more freedom to cut them down to whatever size/shape I need them to be. Garden steppers cost more, so I’d check out the wall stone and see if any pallets contain sizeable enough of material.
You asked me on the phone if I do jobs like this….and I do, but am booked up for the year, not looking to take on any wall projects. I do offer phone/email consultation services for 119 per hour, site consultation services for 400 for a 1 hour visit, and 1 on 1 wall building instruction/private workshops, for $950 per day. Shoot me an email if you think one of those sorts of services would help.