Devin Devine, stone mason
contact devin@devineescapes.com
Color matching old mortar
When a contractor tells their customer that there’s no way to guarantee that the new mortar will match the old….well that’s sort of true. If you just use ready mix mortar out of the bag, it’s going to be rather gray/white, whereas your old mortar is probably *buff/darker gray. My first few jobs like this involved a bit of trial and error.
*stone masons aren’t allowed to say “yellow”. It’s buff.
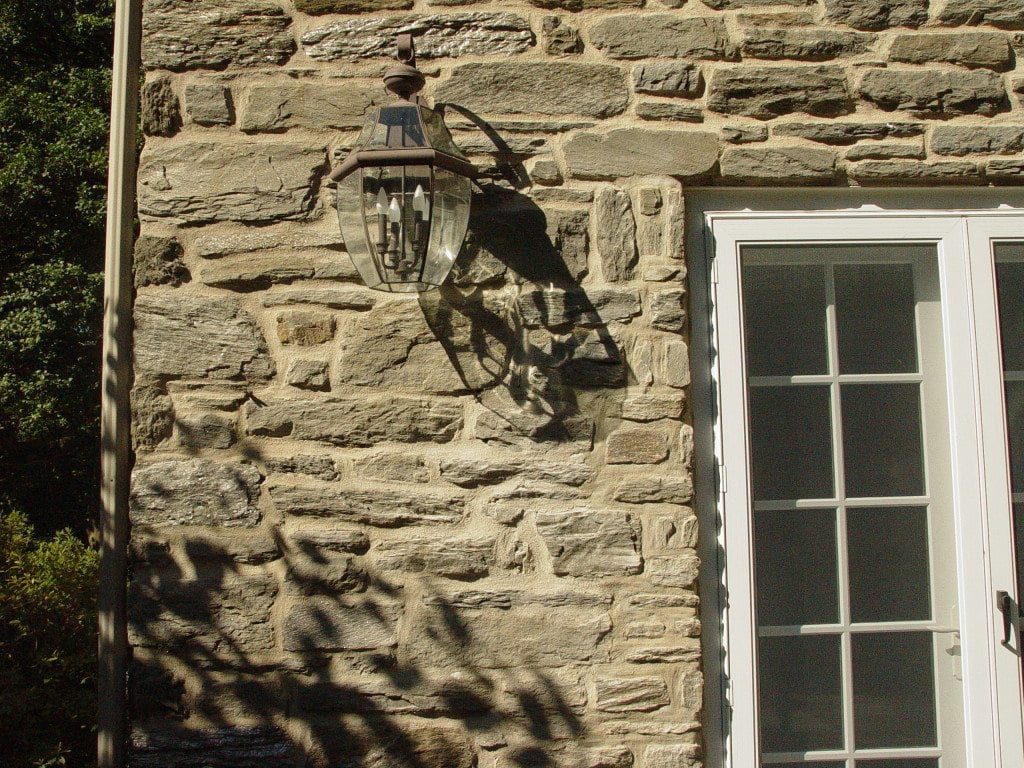
Completed work, new pointing matches the old
![]()
Materials needed for mortar color match:
- Bag of pre-mixed mortar OR portland cement and sand and lime
- Quickrete buff dye and charcoal dye.
- Sometimes brown pigment. Usually, these 2 or maybe 3 is all you need.
Tools needed:
- Wheelbarrow or basin or bucket, for mixing.
- Bucket for water with dye added
- Diamond trowel
In most cases this is all you will need. If you need to match the speckled texture of old historic mortar……then you may be getting more involved. Using larger and darker sand is a big help here. Acid washing afterward may be a part of it. This present article will assume that you are not trying to replicate a very specific color or texture, and that you’re not repairing a historic lime mortar, but working on something that was originally built within the past 100 years…….the prompt for me writing this article was an email asking me about re-pointing a flagstone patio, doing a partial re-point. The original color needs to be matched so we don’t have 2 sharply contrasting mortar colors.
Related content:
- how to replace the mortar in between flagstones
- flagstone joints, sand, cement, polymeric sand or what?
Detailed Instructions for mixing up a mortar match
- Mix up a small batch of mortar in a bucket. Don’t make it too wet or too dry, but make it the same consistency that you’ll be using when you do the repair for real. Mix up just a trow full or two, for now. Spread this small sample out across a piece of cardboard, or on a flat stone. Spread part of this same out very thinly, scraping it along the surface so it’s paper thin and dries fast. Compare this sample to the mortar that you are trying to match.
- Usually–but not always–the old mortar has darkened and yellowed a bit. Usually–not always but almost always–I only need to use buff dye or pigment and charcoal dye/pigment. Add a cap full of buff and a cap full of charcoal TO YOUR BUCKET OF WATER. Mix up a batch with say 1 cap full of each dye to one 3 gallon bucket. or 5 gallon. Whatever you’re using. My “cap full” is whatever measuring cup is handy. A plastic bottle cut in half works.
- Keep making batches until you have a solid color match. Batches can be made to dry faster by putting them in the sun to dry, by spreading thinly on the surface, by spreading on cardboard, which absorbs the water from the mortar, or by using a heatgun–a propane torch can be used but keep the flame far enough away from the mortar that the flame won’t discolor it. Just put it in the sun and spread it thin–it will dry fast enough, no heat source needed.
- Usually buff and charcoal is all you need–but I always bring brown dry pigment with me–just because I have lots of dry pigments already. The last repair job I did I ended up using 5 cap fulls of buff, 6 of charcoal and one measure of brown pigment powder to 3 gallons of water
phone consultation services
DIY hardscape/masonry/flagstone help rates:
$142.00 for one hour
$88 for a half hour
Monies are payable by Venmo
In one hour I can teach you how to build or repair your flagstone patio.
Case Study: an example from a recent restoration job:
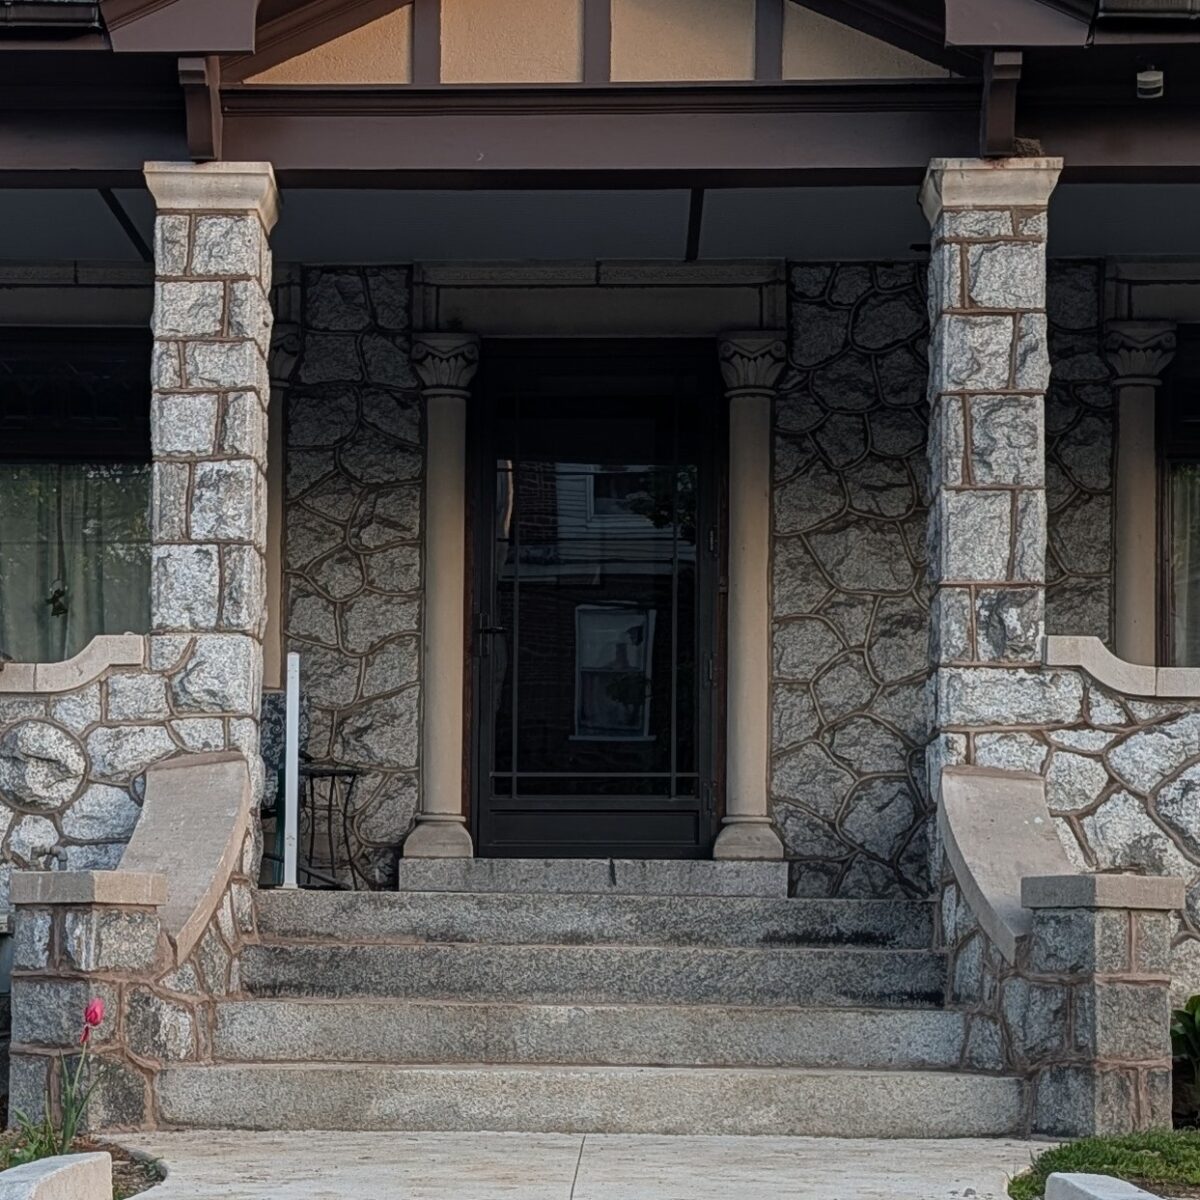
Recent restoration job in Allentown PA. Walls were rebuilt and needed to match the older walls in mortar color–but the old walls had aged unevenly. My job is to land somewhere in the middle, as close as possible.
NOTES:
- take notes, label each sample with same A, B, C, etc and have a notebook specifying what amounts of dye were added to each batch.
- compare each batch to what you’re matching. In most cases, the mortar that you are trying to match isn’t itself perfectly consistent. The old mortar, on the patio (or wall for that matter) usually hasn’t aged with perfect consistency and you might have 3 different shades of mortar within a hundred square foot space…..even if you get your color match perfect–in one area of the patio–it’s still slightly imperfect compared to another area, just a couple feet away–but it’s close.
- You should try to do entire sections all in one day–try to do entire sections all in one batch. If an entire 100 square foot section of wall or patio is separate from the other section–than I want to do each section all in one shot. Makes consistency easier. If you are forced to make a new batch of mortar midway through a section–make the new batch before finishing your last batch. Compare the two. Say I’m down to half a bucket of mortar–I’ll tell a worker to make me a new batch. Stir that bucket of dye-water first! Then, after he’s made a new batch, a walk my bucket over to his mix area–and compare the two–hopefully we’ve kept our water and dye levels consistent, but I want visual confirmation. I compare what he’s just mixed in his wheelbarrow with what I’ve got in my bucket. If it looks wrong, then a) maybe he’s added too much or too little water with dye or b) maybe we have the wrong amount of dye added to the water or b) some of the dye may have settle to the bottom of the bucket. Always stir or otherwise agitate that dye-water a bit before using it.
- If your second batch doesn’t match the first batch…..as happens sometimes………….then add dye as needed, add dry mortar to keep your batches the same amount of water content…..it can be a bit of frantic mixing, if/when this happens, but it’s always worked out well for me.
- pre-mixed mortar works excellently for this sort of job. Unless you’re working on a large new job, with various applications and where various tailored mixes are going to be needed–why bother buying sand and portland cement and lime? On truly large jobs, buying separate ingredients will save a bit on material–but will take extra labor. Small re-pointing job–just buy premix and some dye.
Compare:
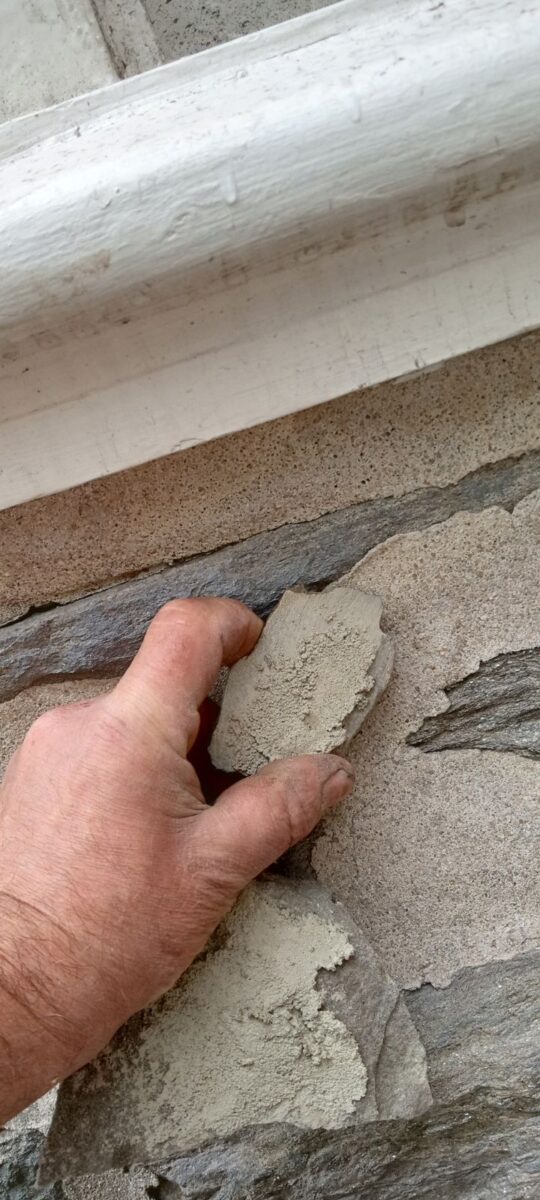
Mortar color in this sample is not quite right, yet.
Hold the same right next to the old mortar–in this case, a wall–compare. Sure, the new stuff isn’t 100 perfect–but since what we are matching to is inconsistent, perfection is not possible–so squint your eyes a bit. Binging your eyes slightly out of focus, and the difference becomes unnoticeable. From 10 feet away it will be hard to tell where the new and old meet.
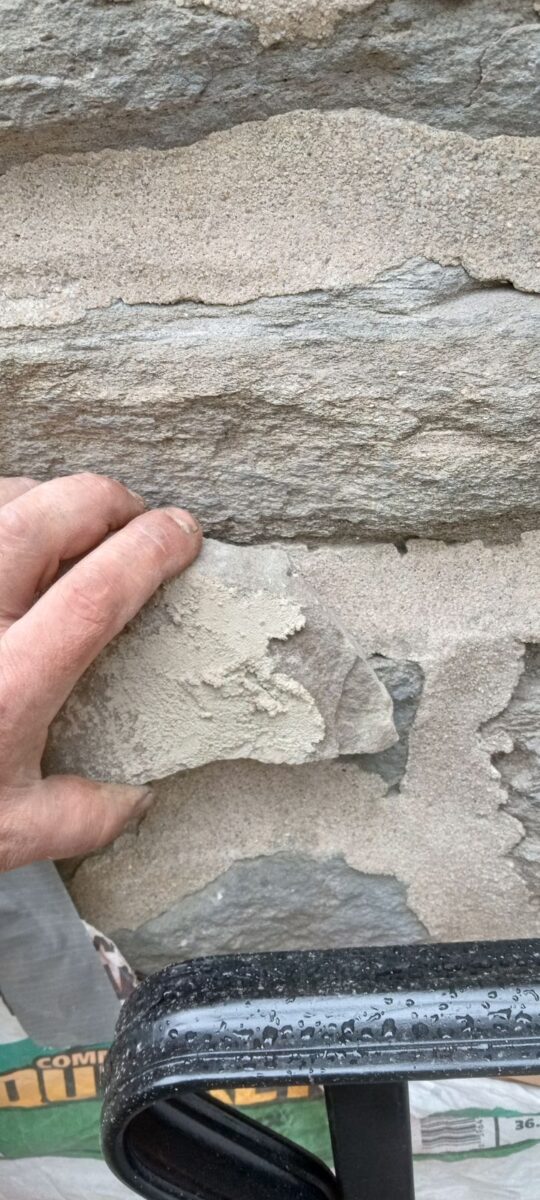
Getting closer, dialing it in.
A mortar match is rarely perfect, but it should be close

Flagstone repair job from 2008. I didn’t get the match perfect–but the walkway I was repairing had 3 different shades. Which shade should I match? Looking up close like this, you can see the line where the old stuff stops and the new mortar starts–but this is way up close. From a standing position, you can’t tell from six fet away.
Other Tricks for mortar color matching:
I used to show up with multiple types of sand, gray portland cement and white portland cement. I would try different combinations of sand and cement, trying to get it as close as I could without any dye or pigment–and then adding dye, if needed. But that was more work.
Older mortar usually gets a bit speckled. Sometimes, very speckled. To really match a “very speckled” situation, you may need to use larger, darker, angular aggregate. A mix of red and black screenings has helped us, before. The screenings are used in replacement/partial replacement of the sand, and the joint is acid washed after hardening, to bring out the aggregate. But that’s rare. Usually it’s a minor speckling and you’d have to look really close to notice it. Such is the case with any flagstone re-pointing jobs that I’ve ever encountered, but on older walls it sometimes becomes important.
Frequently Asked Questions About Mortar Color Matching
Why doesn’t my recently repaired new mortar match the old mortar?
Your contractor just used mortar out of the bag, either pre-mixed or needing to add sand. But they didn’t bother trying to match the color, no dyes added, no test batched made.
Will mortar darken with age?
It tends to, yes.
Can mortar dye be added after the mortar is mixed?
Not effectively. It’s best to add dye to the water before mixing.
How close can a mortar color match be?
It can be nearly impossible to distinguish. Other times 90% close is plenty close enough. Often, due to uneven aging on the mortar you are trying to match, a truly perfect match is not going to be possible.
What pigment colors are most useful?
- Buff.
- Charcoal is a close second.
- Brown is a somewhat distant third.
For individualized guidance for your own masonry repair project, get in touch for a 1 on 1 phone consultation:
phone consultation services
DIY hardscape/masonry/flagstone help rates:
$142.00 for one hour
$88 for a half hour
Monies are payable via Venmo, paypal or zelle
email: devin@devineescapes.com
![]()
Trackbacks/Pingbacks